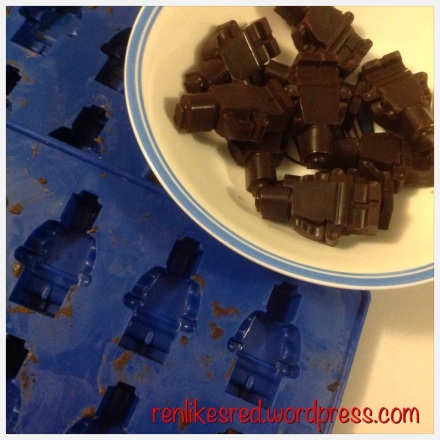
HEALTHY CHOCOLATE LEGO MEN

20131017-204832.jpg

Since my little man’s second birthday party last weekend, we’ve all developed a real taste for sweets. This is not such a good thing.
Fortunately, these days I know how to make delicious chocolate with healthier ingredients in no time at all. It beats reaching for the family block of Cadbury anyway and tastes so much better!
The honey in these is from my local farmers market and it is so divine. It creates a sticky toffee like centre to the chocolates. Just heaven! The kids go nuts for these (if I save them any!)
You can get all sorts of silicon moulds which are ideal for popping the chocolates out easily. I got these 2 trays of Lego men (8 shapes per tray) on eBay for about $14 (AUS) with free shipping.

YOU WILL NEED

2 heaped tablespoons organic, cold pressed coconut oil

1 tbs rice malt syrup

1 heaped tablespoon cacao

* The reason I “heap” the spoonfuls is because I’d rather have a little too much than not quite enough… And you can always lick the spoon! That said, don’t go too overboard with the honey or they’ll be very sticky and won’t set properly.

HERE’S HOW

Melt all ingredients in a saucepan on a medium heat until combined.
Fill silicon trays with chocolate mix and freeze for about 1/2 an hour.
Makes 16 yummy chocolates.
Perfect for a Quick and easy late night treat… I dare you to stop at one!

NOTES and tips I’ve learned along the way: *These chocolates need to be kept in the fridge or freezer.

*Use your smallest pot/saucepan for this as it seems to help the ingredients combine more thoroughly.

*Make sure the rice malt syrup is thoroughly melted through the mix otherwise it will sink to the bottom of the moulds and they won’t set properly.

*Make sure you lay your moulds flat in the freezer. If the chocolate mixture is not distributed evenly, bits and pieces break easily – usually the poor little fellows heads fall off!

Check out my Facebook page for more renlikesred!

20131017-202604.jpg
Enjoy the goodness 🙂

Happy little accidents… Chocolate fudge ice cream

With a house full of guests expected for the weekend, I filled my trusty food processor with cups and spoonfuls of dates, nuts and cacao, ready to whizz into one of my favourite delicious treats from Whole food Simply: Raw Chocolate Fudge
So of course, at that very inconvenient moment, the blade refused to spin and after four years of faithful service, my food processor decided to call it quits.
Now I could have thrown a tantrum of sorts and dumped it all in the bin, but I thought, oh well my blender is pretty powerful, I’ll give it a go.
Without success. It’s good, but its no thermomix.
So I added some liquid, which helped a little, so then I added more liquid which made it creamy and well, frankly, delicious!
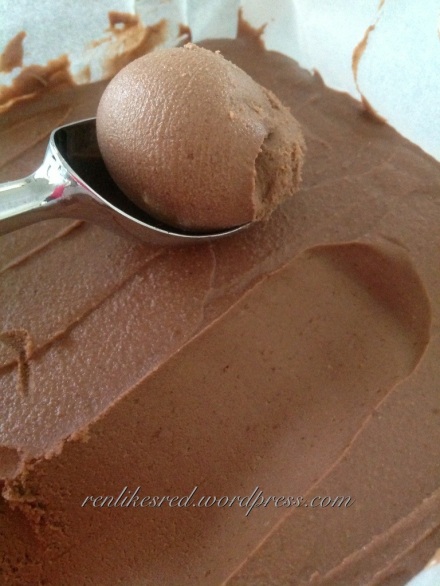
A bit rich for a smoothie I poured it into a Pyrex container lined with baking paper and put it hopefully in the freezer. The result… Indulgence at is finest!

20131016-150819.jpg

CHOCOLATE FUDGE ICE-CREAM

2 cups medjool dates, chopped and pits removed

2 cups macadamia nuts

2 tablespoons cacao

1 cup and 1 tablespoon of coconut cream (I used a 270 ml AYAM can)

1 cup almond milk

Here’s How

Place all ingredients in a blender or food processor and combine until silky smooth.
Pour into a lined pyrex dish, loaf tin or freezer safe container and freeze until set for at least 2-3 hours.

* This has the perfect consistency for ice cream and my kids are absolutely mad for it.
They eat it in small cones or bowls and I’ve also used a few spoonfuls as a base for yummy smoothies.
If my food processor wasn’t broken, I’d try blending some with some frozen banana or serving in a dish with a scoop of each. Yum yum yum!

I’m sure some of the finest dishes in the history of food have come from happy accidents. Do you have any wonderfully unexpected culinary creations that you’d like to share?

Check out my Facebook page 🙂

Beautiful Bone Broth

20131005-104338.jpg

Dear lovely Vegan friends, look away now.

I’ve been making my own nourishing, flavour packed stock for about a year now and as well as being so good for us, it adds such a depth of flavour to so many meals. Well, actually, I’ve recently learned that what I’ve been making is in fact broth not stock. The difference apparently being that meat stock is the product of slow cooking pieces of meat (such as a whole chicken) in water flavoured with some veggies, herbs, salt and pepper, while bone broth is as it sounds, a flavoursome broth made from roasted bones, slow cooked in water, also flavoured by veggies, herbs, salt and pepper.
Both are delicious and full of healthful gut healing and immune boosting properties. As the meat or bones are cooked, their nutrients are slowly released into the water – vitamins (particularly the B vitamins) amino acids, nourishing fats and minerals. Meats cooked in water are a good choice for people with digestive issues as they are easier to digest than roasted, grilled etc…
This is hardly a new concept or surprising info. What’s the first thing people crave when they are sick? A comforting bowl of soup. One of the oldest, most popular home remedies for healing all ailments and ills, is a hearty chicken soup.
For more information about the healing benefits of Broth/stock I highly recommend checking out “Gut and Psychology Syndrome” (GAPS) by Dr Natasha Campbell-Mcbride.
Now, lets get down to business and make some broth!
I should add, for the record, that making broth/stock is so easy (especially if you have a slow cooker) and costs basically nothing. You’ll wonder why you ever bothered with cubes and cartons.

20131005-103543.jpg

YOU WILL NEED

* 2 carrots, halved

* an onion, quartered

* 1-2 celery sticks, halved

* any other vegetable scraps you have or those that are looking tired in your crisper.

Note: Throughout the week as I cook, I collect things like celery tops, broccoli and cauliflower stalks, kale and silver beet stalks and stems and store either in the fridge or freezer to add to the stock.

* 1 tablespoon apple cider vinegar

* 1 teaspoon good quality salt (pink Himalayan or Murray river if in Australia)

* 1 teaspoon black peppercorns

* 2-3 bay leaves

* 1 tbsp mixed dried herbs

20131005-155857.jpg

* And most importantly, BONES!

20131005-163512.jpg
It is important that your bones come from healthy free range animals – apart from the obvious ethical issues – you’re not going to get a lot of nutrition from a malnourished factory famed animal.
Until recently, most of my stock was made from chicken (bones) as it was the easiest free range animal to source locally. Drumsticks in particular are always a hit with my kids. They’re cheap, easy to cook and the meat falls easily away from the bone. When I’m making stock, I usually request that the meat is cut away from the bone rather than chewed and sucked dry! Mind you, after being re-roasted at a high temp in the oven and then slow cooked for 24 hours, I’m pretty sure that any bacteria from our eating would be well and truly killed.
Recently, good old social media put me back in touch with an old school friend who shares similar concerns and ideas around food and nutrition. She put me onto a local farm who deliver to my door, delicious bulk orders of beef and lamb from ethically farmed, grass fed animals. Check out http://www.braelandsbeef.com I also received a huge box of bones with my order for free. Some went to the dogs of friends and families, some into the freezer for a later date and some straight into the oven to roast for what would be the richest, darkest, best broth I’ve ever made!

20131005-164038.jpg

HERE’S HOW

* Roast bones (in a couple of knobs of butter, coconut oil etc…) at 200 dc (390 F) for about 30 mins or until nicely browned

* place all other ingredients in the slow cooker (crockpot)

* add your roasted bones

* fill with water, making sure all ingredients are well covered

* for chicken bones – cook for 12-24 hours
* for larger beef or lamb bones – cook for 24-72 hours.

Note: The finished broth pictured (from beef bones) was cooked for 40 hours.
You may need to top the water up once or twice during cooking.

20131005-171346.jpg

* When the broth has finished cooking, remove all ingredients from pot with a slotted spoon and discard.

* Ladle the liquid through a strainer (sieve) into a jug and pour into clean glass jars.

20131005-174318.jpg

* fill the jars leaving about an inch from the top. (This is important as the liquid may expand while freezing and if too full, cause your jar to break.)

* store in the freezer for a least 3 months but probably a lot longer. Mine is always used by then!

20131005-174811.jpg

Enjoy the goodness 🙂
Apple, Blueberry and Ginger Smoothie

20131002-223756.jpg
How do you start your day?
I’ve written before about smoothies being an absolute essential in the mornings here. Apart from the fact that they are such a brilliant way to get a lot of ‘easy to absorb’ nutrients into you and your kids in one rapid burst of tasty goodness, with a little planning they are as simple as shake and pour.
My little ones have no patience for messing about in the kitchen when it comes to breakfast. We eat dinner each night quite early, at about 5pm, so by 7am the next day their hungry little tummies are screaming out for instant satisfaction. Well, so are their mouths actually.
Generally they enjoy their breakfast ‘moothie while I like to start things off with something a little more green.
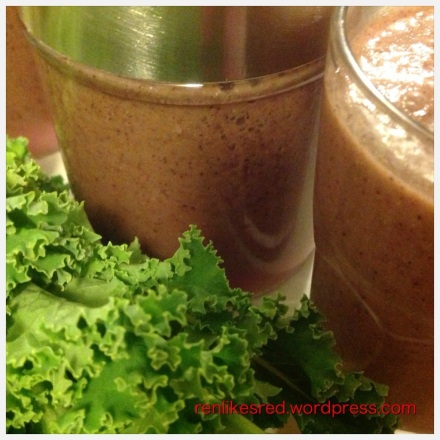
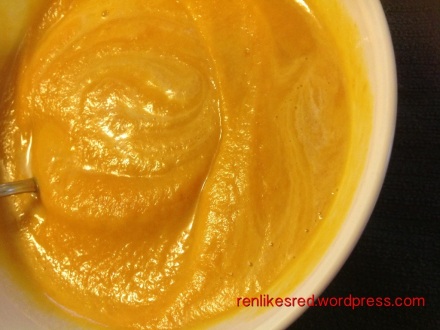
My favourite smoothie at the moment is fibre full, protein packed, (chia seeds, kale) bursting with antioxidants, vitamins and detox gems like lemon and ginger and balanced with the healthful fat of an avocado. It’s such a delicious way to start your day and you can hear every cell in your body whispering thank you!
The kids aren’t rapt about the ginger in this one, which is awesome. Finally something I don’t have to share 😉
I make all of our breakfast smoothies at night after dinner and store them in glass jars where they keep quite happily. This makes a full blender’s worth which I also drink as a snack during the day.

20131002-230611.jpg

APPLE, BLUEBERRY and GINGER SMOOTHIE

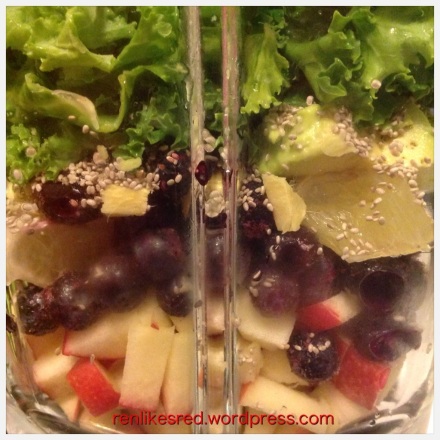
2 small apples finely diced (or one large)
1/2 cup frozen or fresh blueberries
1/2 a lemon
1/2 an avocado
1 small knob of ginger (1/2 – 1 inch) finely chopped
2 tbsp chia seeds
6 washed and de-stemmed kale leaves
Cold water to fill blender.

HERE’S HOW

In the order as written above, place all ingredients into your blender and process until silky smooth.
Pour yourself a glass immediately and store the rest in airtight glass jars in the fridge.
Overnight, some of the liquid will separate from the fibrous pulp, just shake before serving.
Enjoy the goodness 🙂
Keeping things simple

These days, I like to have a protein packed, hearty lunch such as this which has me fully fuelled to keep up with two energetic little boys. It also leaves room for a simple dinner, something satisfying and flavoursome but also easy to digest.
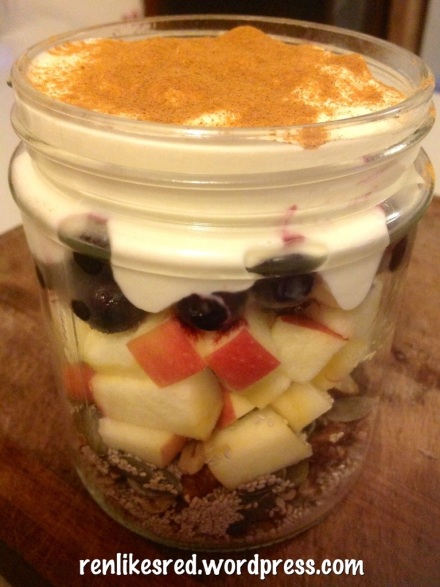
This soup is so family friendly. It’s easy to make, extremely cheap, deliciously sweet and as my mum used to say about soup, “will warm the cockles of your heart…”

20131002-140534.jpg

CARROT, ORANGE AND GINGER SOUP

1kg (2lb) carrots
1 orange (juiced)
1 knob of ginger 2.5cm (1 inch)
1 garlic clove
1 leek
1 tbsp olive oil
4 cups good quality stock
2 tbsp coconut milk/cream to finish

Note: I would have garnished with some fresh parsley (or coriander/cilantro would be lovely too) but mine has gone to seed in my garden!

HERE’S HOW

* Slice, dice and chop all of the vegetables

* Sauté leek, ginger and garlic in a large cast iron or heavy based pot

* Add orange juice letting it heat in the vegetables

* Add carrots and stock and bring to a boil

* Cook on a medium heat for about 20 minutes or until carrots are tender

* Blend (with a stick blender in the pot or transfer to a blender.)

* Finish with coconut cream and fresh herbs if you have some handy.

20131002-143932.jpg
Another note: I first saw this recipe (or something similar) years ago in a food magazine. At the time, I was a struggling student and this was the perfect budget meal to keep me going. It keeps well for up to 5 days in the fridge or you can share it with your family or your equally broke sister as I did back then. There are most likely many versions of this soup all over the Internet, but this is how I like it.

20131002-145028.jpg
Enjoy the goodness 🙂
Breakfast In A Jar

20131020-204434.jpg

Most mornings we are all rushing about, trying to get fed, dressed and out the door with minimal fuss. On such mornings, smoothies such as this one are ideal to make the night before, store in a jar and simply shake, pour and drink quickly.
However, for the mornings we don’t have to be anywhere in a hurry, I think it’s really important for myself and the kids to enjoy a breakfast that encourages us to slow down and savour every texture and flavour. The only obstacle I face with such a breakfast, is that two hungry little beasts spring to life the minute they open their eyes in the morning, racing to the fridge to demand instant food to fill empty bellies.
That’s where jars come in handy for more than just smoothies. They are cheap or free and easy to source, recyclable, free from hormone altering chemicals often found in plastics and best of all, they store food really well.
Here are some yummy, filling, nutritious ideas for a slow breakfast in a jar:

20131020-204808.jpg

APPLE AND WALNUT PARFAIT

1 apple, chopped (I used a pink lady)
1/2 cup of walnuts
1 teaspoon cinnamon
1 tablespoon chia seeds
1 tablespoon pepitas (pumpkin seeds)
* 4 dessert spoons Greek/natural yoghurt.
** fresh/frozen berries

* For a dairy free version try coconut milk/cream/yoghurt -delicious!
** Optional

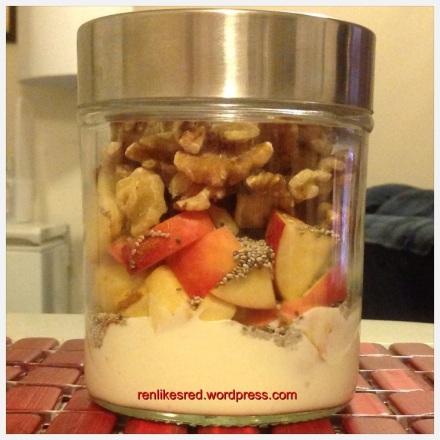
Note: I like my nuts and seeds to remain slightly crunchy so I tend to keep the yoghurt separate – either as a base, followed by the chopped apple and topped with the cinnamon, nuts and seeds, or on top to finish. On top is great as by morning, just enough yoghurt has dribbled down through the rest to moisten the chia seeds and create that gelatinous pudding effect.
This breakfast is packed full of protein, heart healthy omega 3’s, nourishing fats, vitamins and immune boosting gut friendly bacteria. What a great way to start the day!

20131020-205132.jpg

APPLE BERRY PARFAIT

Note: These are kid friendly portions or a perfect adult’s morning tea.

1/2 cup fresh or frozen blueberries
1/2 a pink lady apple, chopped
A small sprinkle of almond meal, cinnamon and chia seeds
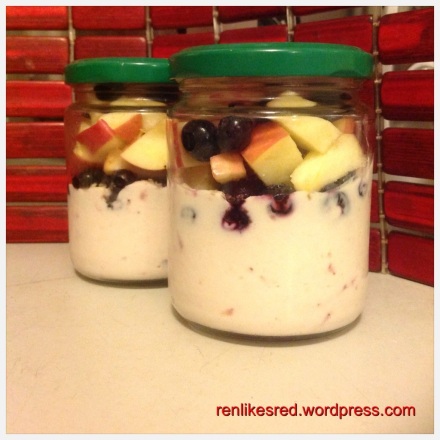
* 2 heaped dessert spoons full fat strawberry yoghurt. (Jalna is a brand I’d happily recommend but just try and choose a yoghurt your kids love that is preferably low in sugar and contains good bacteria.)
* OR, 2 heaped dessert spoons natural yoghurt with a tsp of raw local honey.

Hopefully the sun is shining where you are because these would be lovely eaten outside on a warm spring or summer morning.
Enjoy 🙂